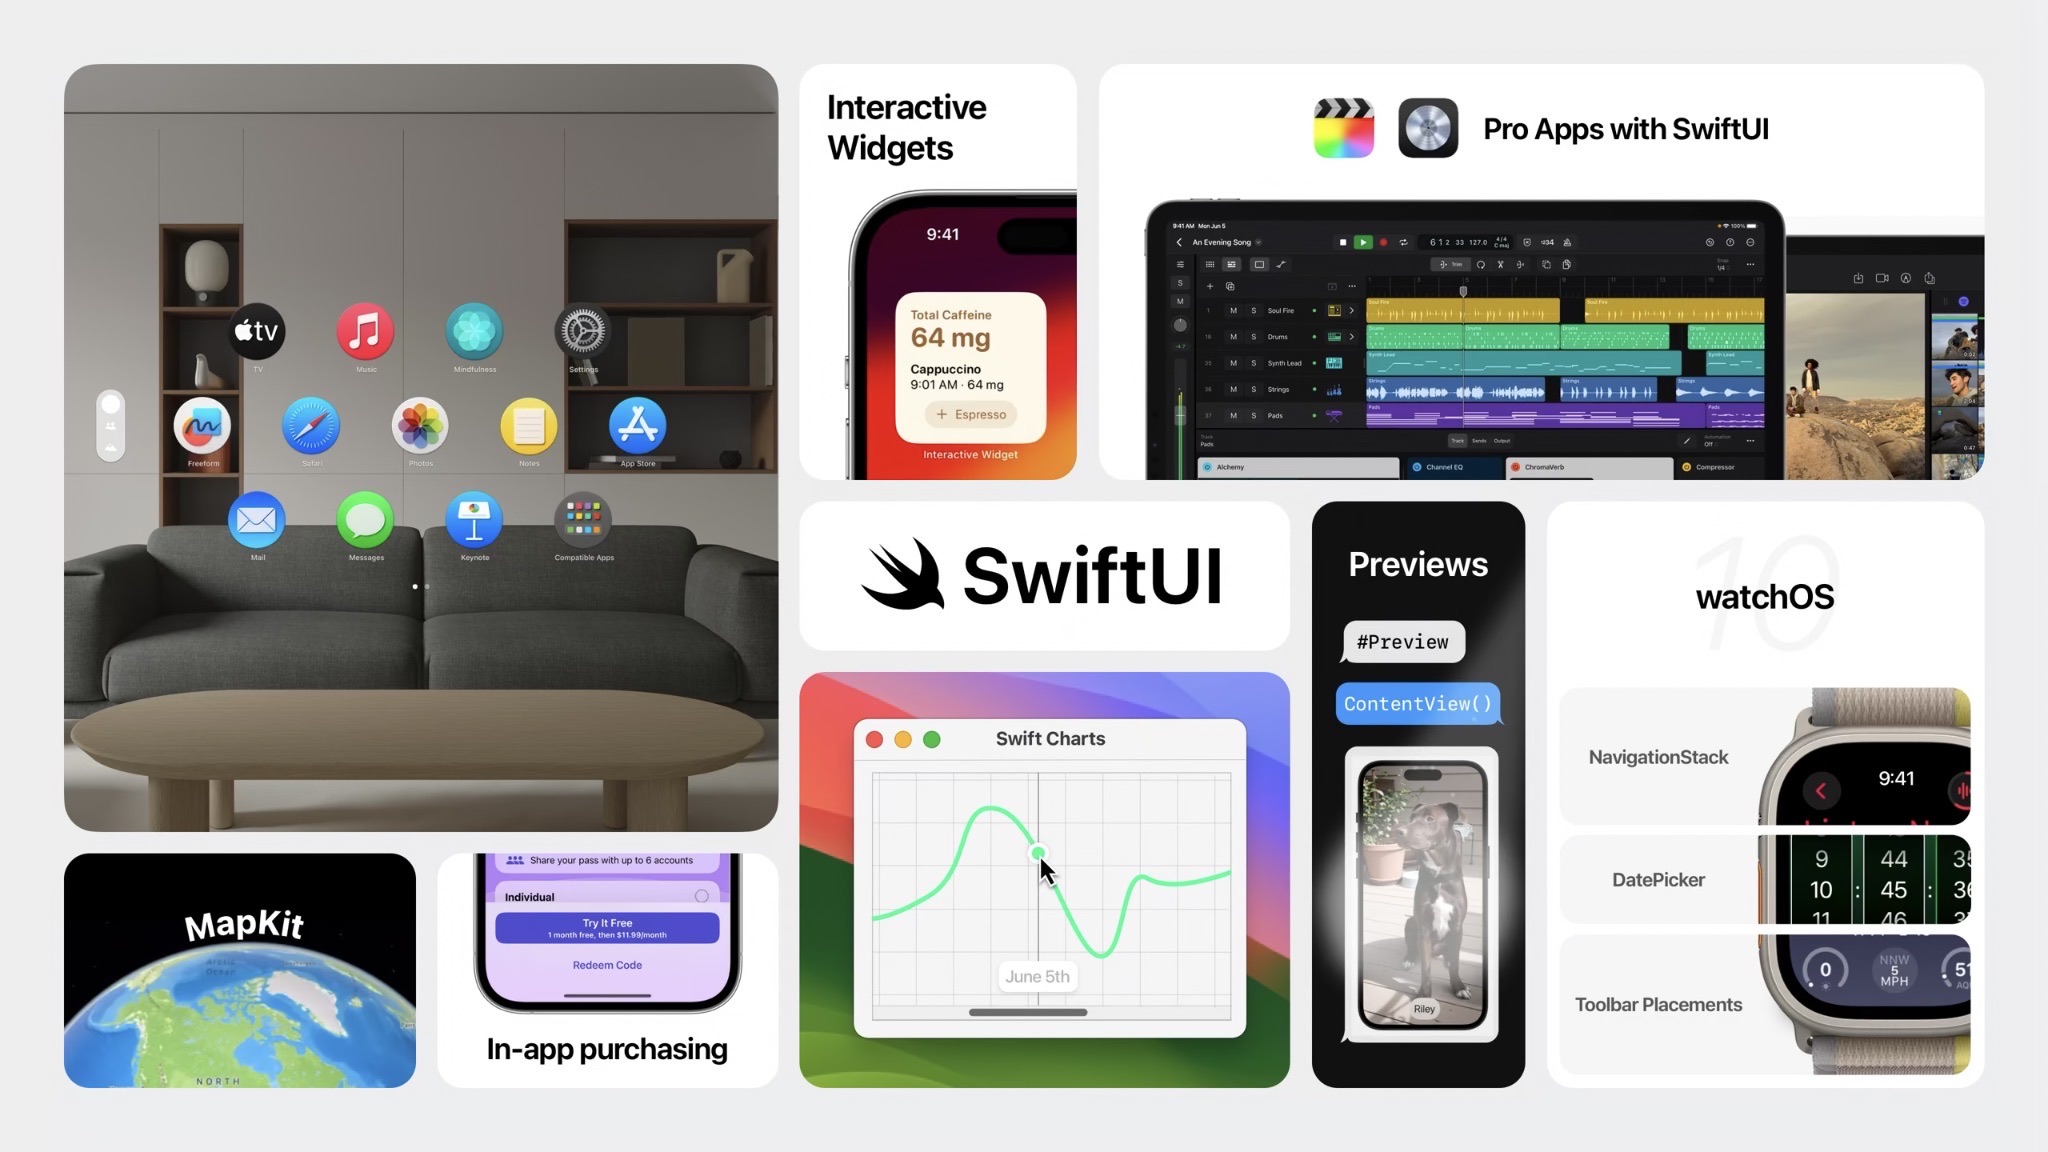
本文为 What’s new in SwiftUI 的学习笔记
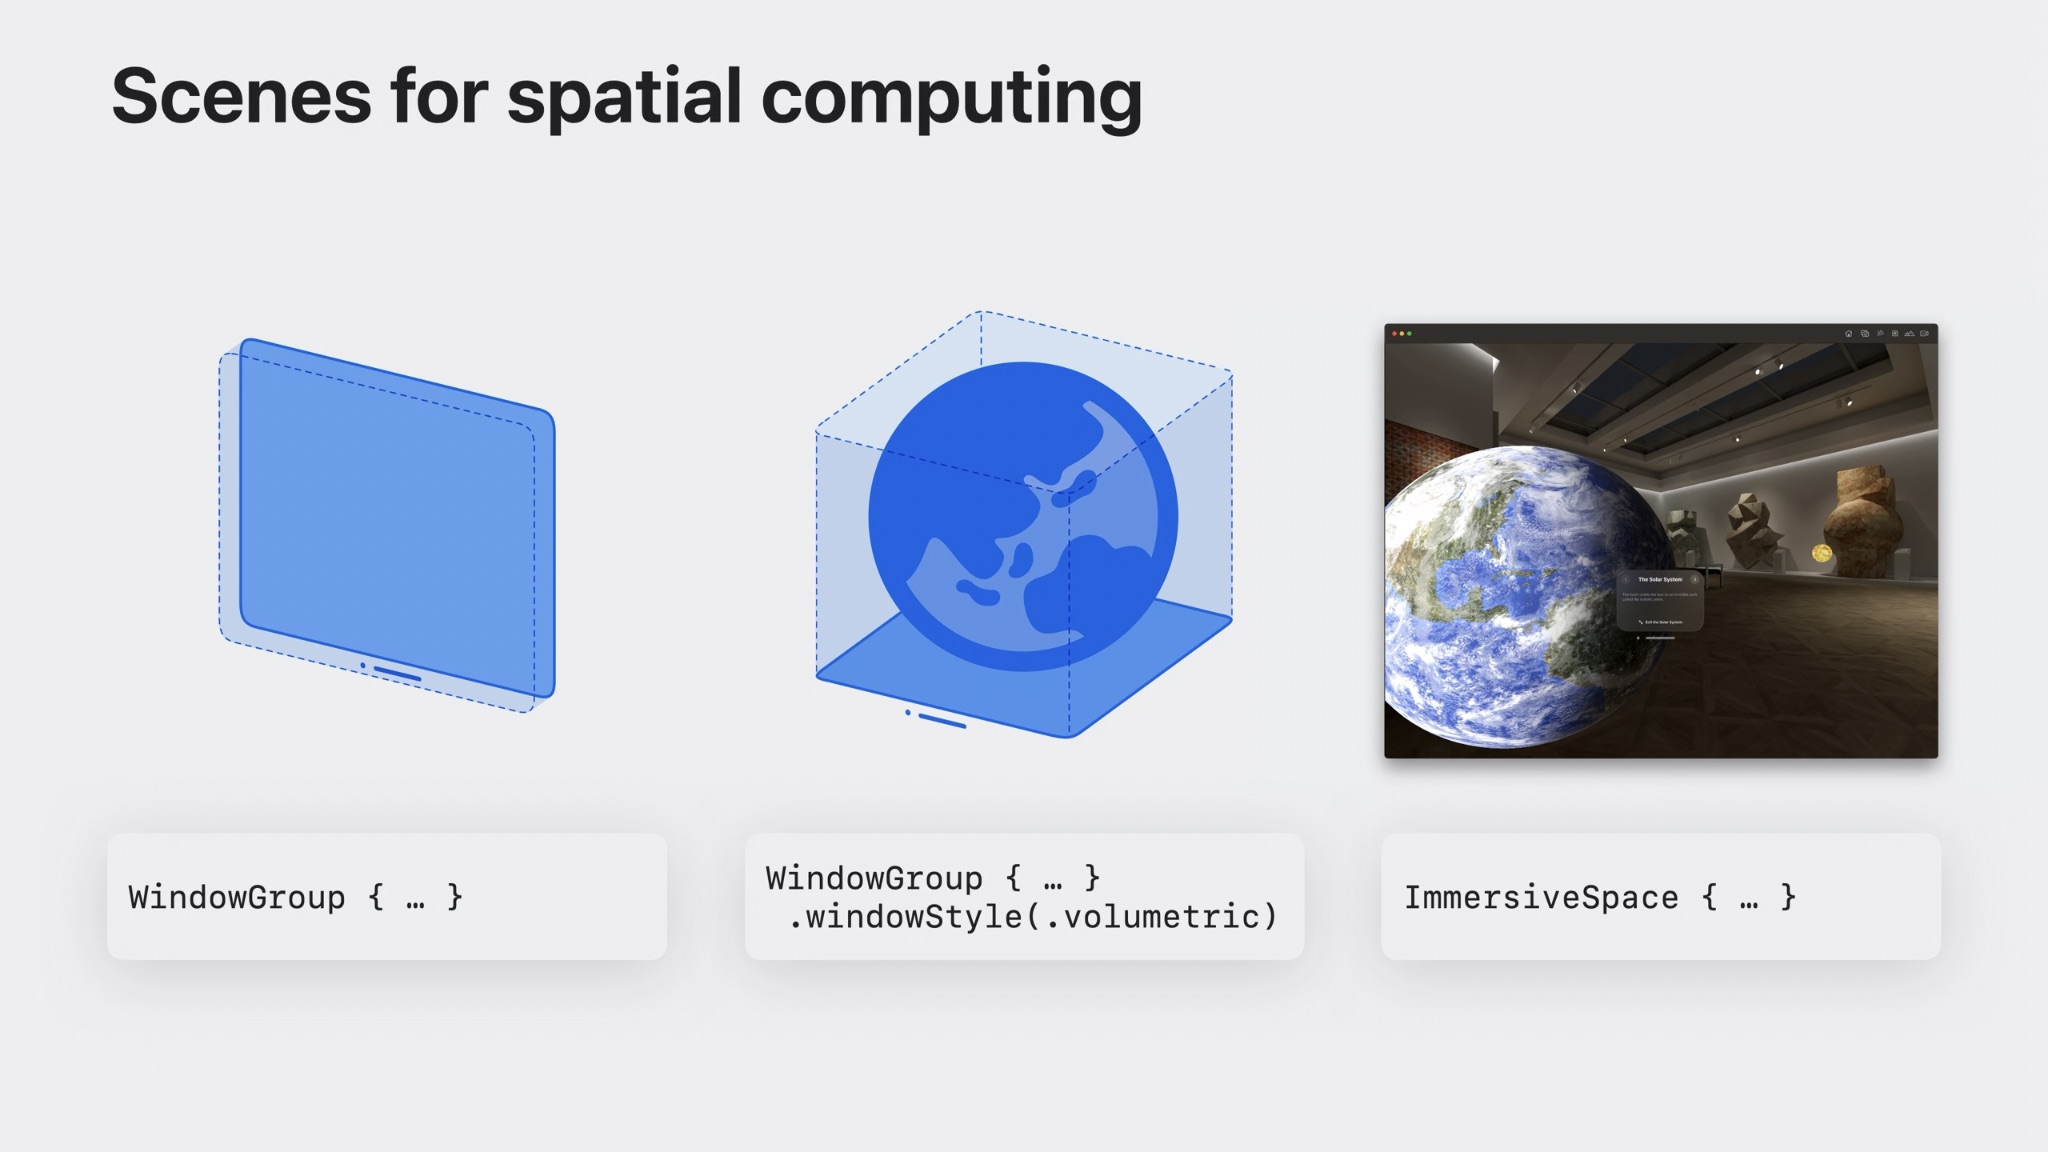
SwiftUI 的更多应用场景 适用于 visionOS 的 Scenes
WindowGroup:SwiftUI 可以直接应用于 visionOS 中,不需要任何设置,以平面的方式显示。
要想增加「深度」上的支持,可以使用 .windowStyle(.volumetric)。
Model3D:载入静态模型RealityView:载入动态模型,包括光线追踪、交互等
ImmersiveSpace:构建完全「沉浸式」的体验。
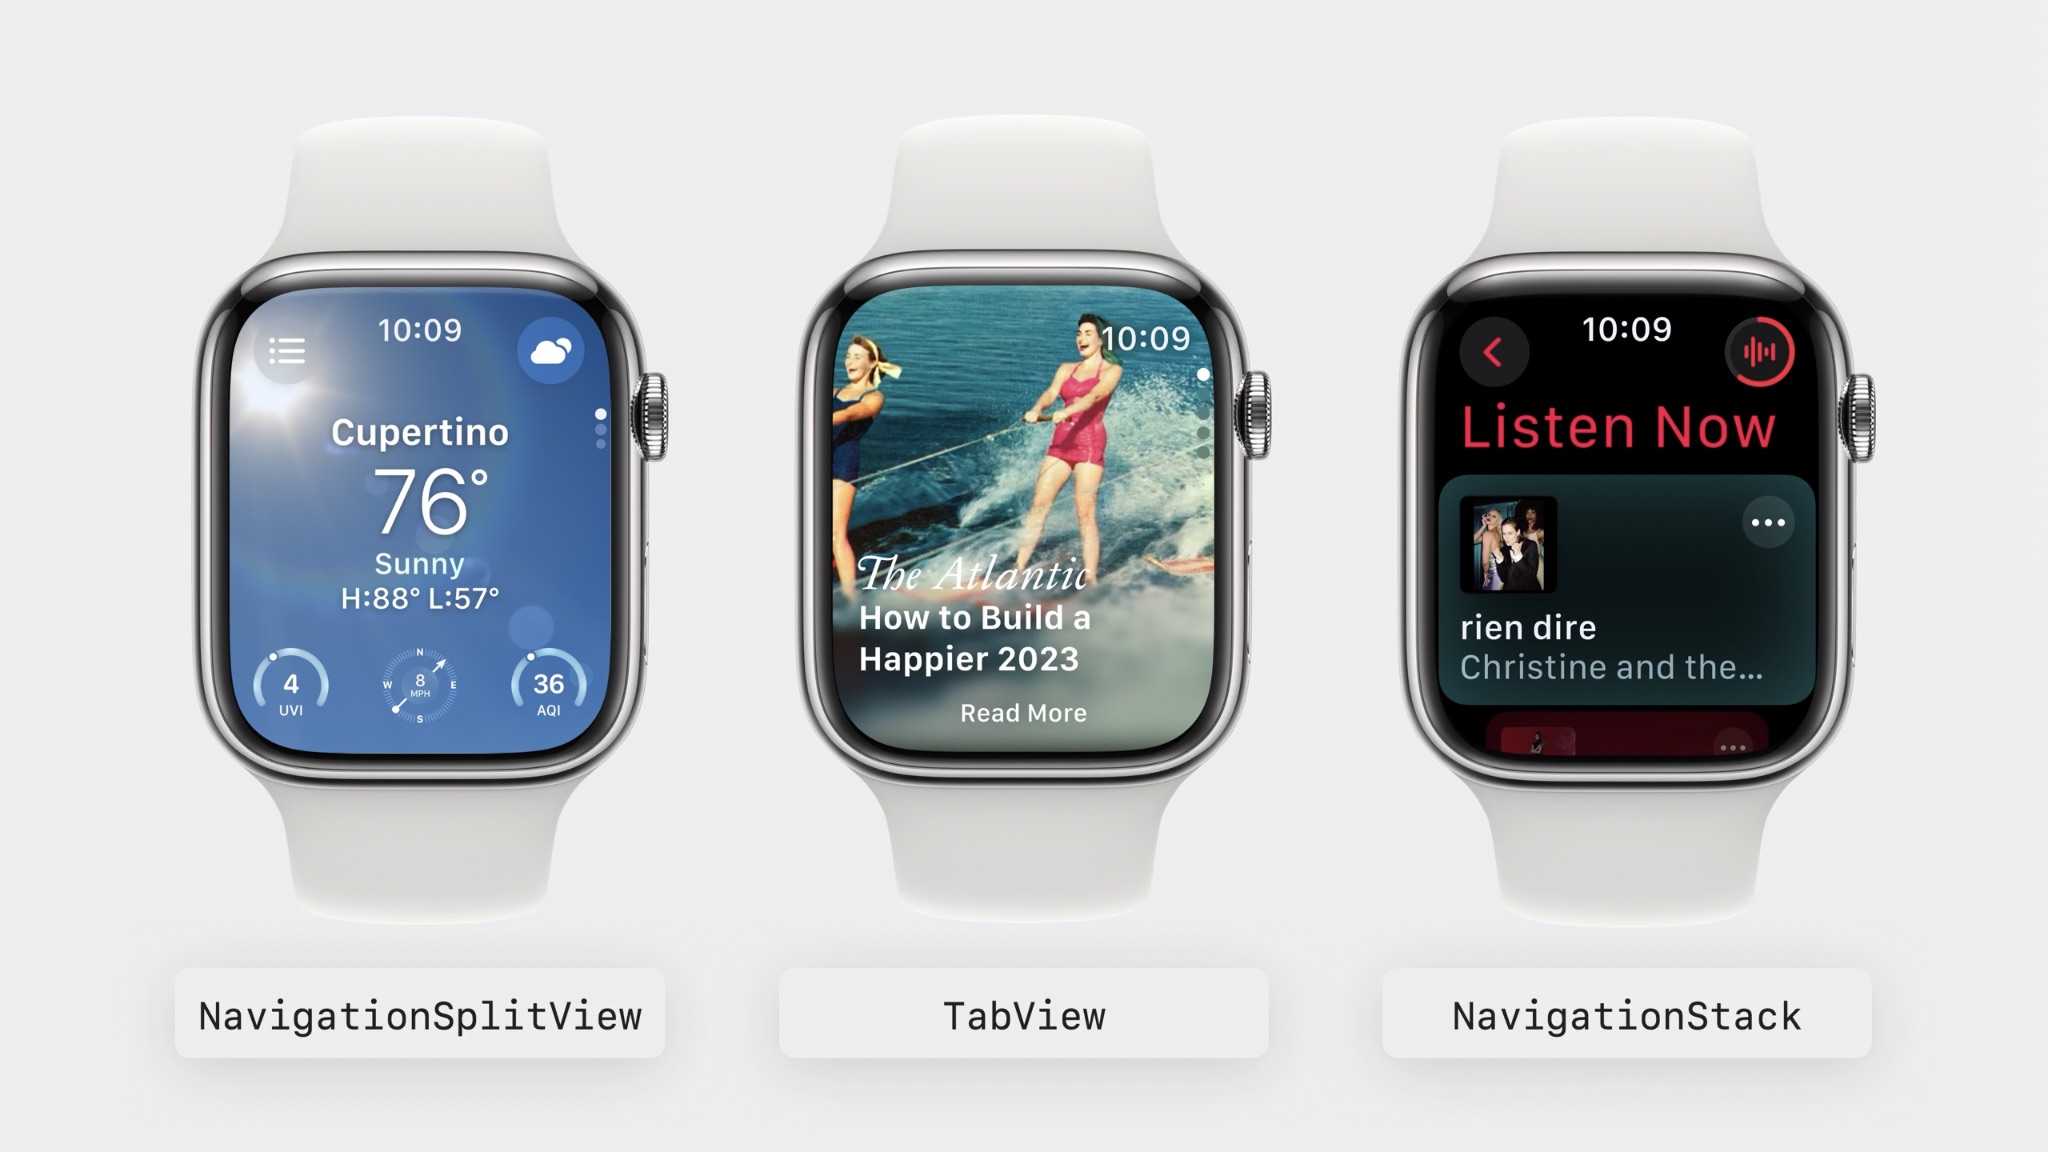
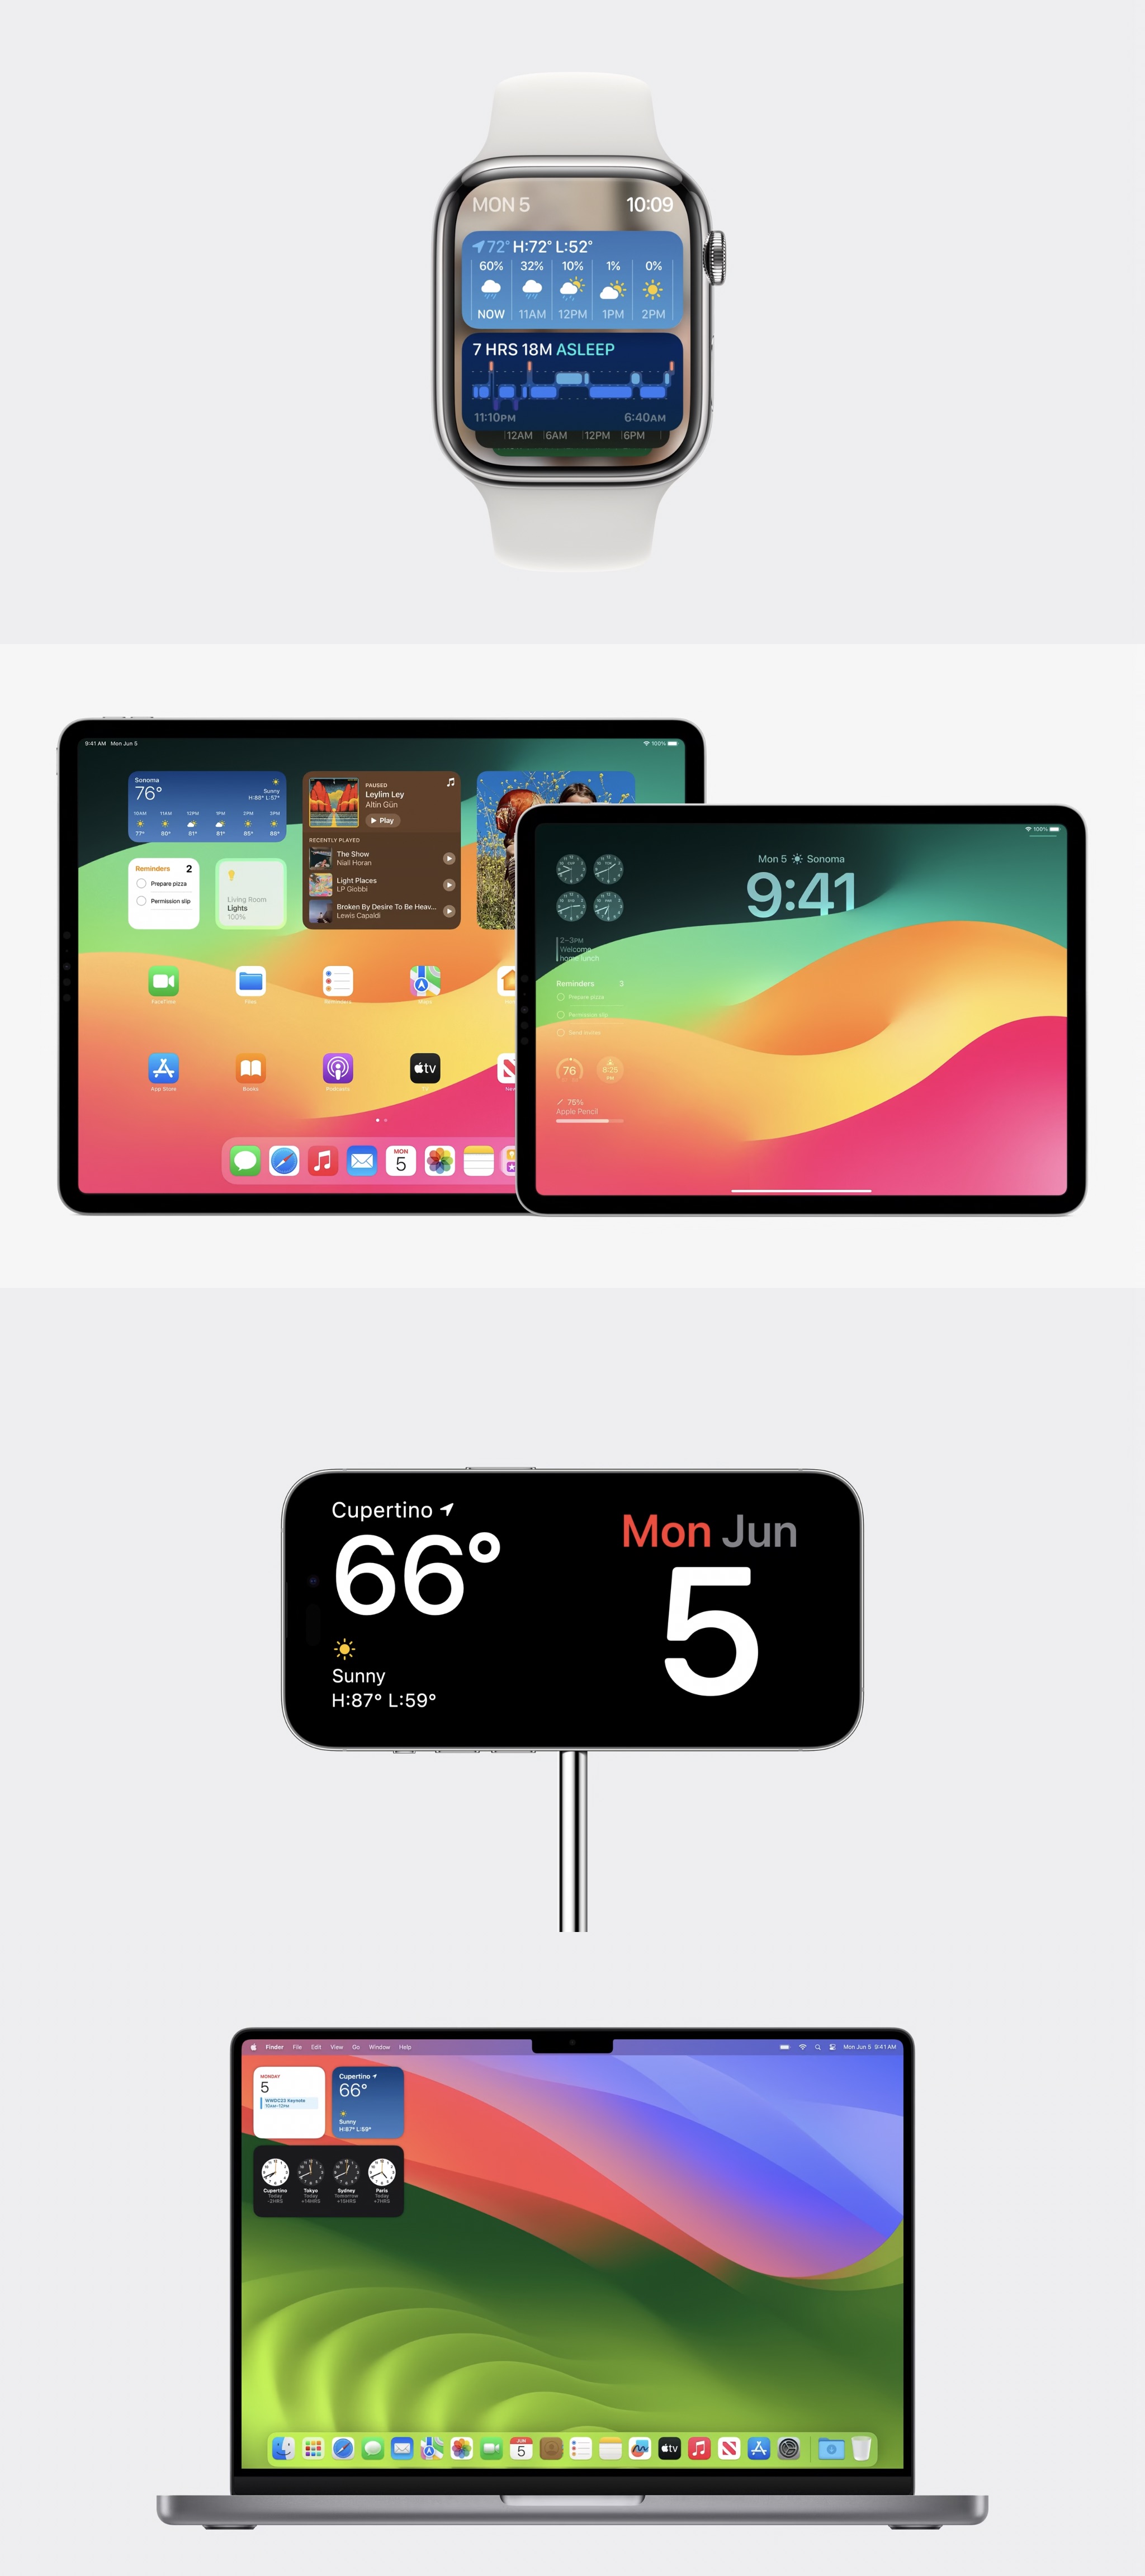
watchOS 10 watchOS 10 经过重新设计。
NavigationSplitView、TabView、NavigationStack 在 watchOS 中也得到的重大更新,并有了新的动画效果
部分 API 得到改进:
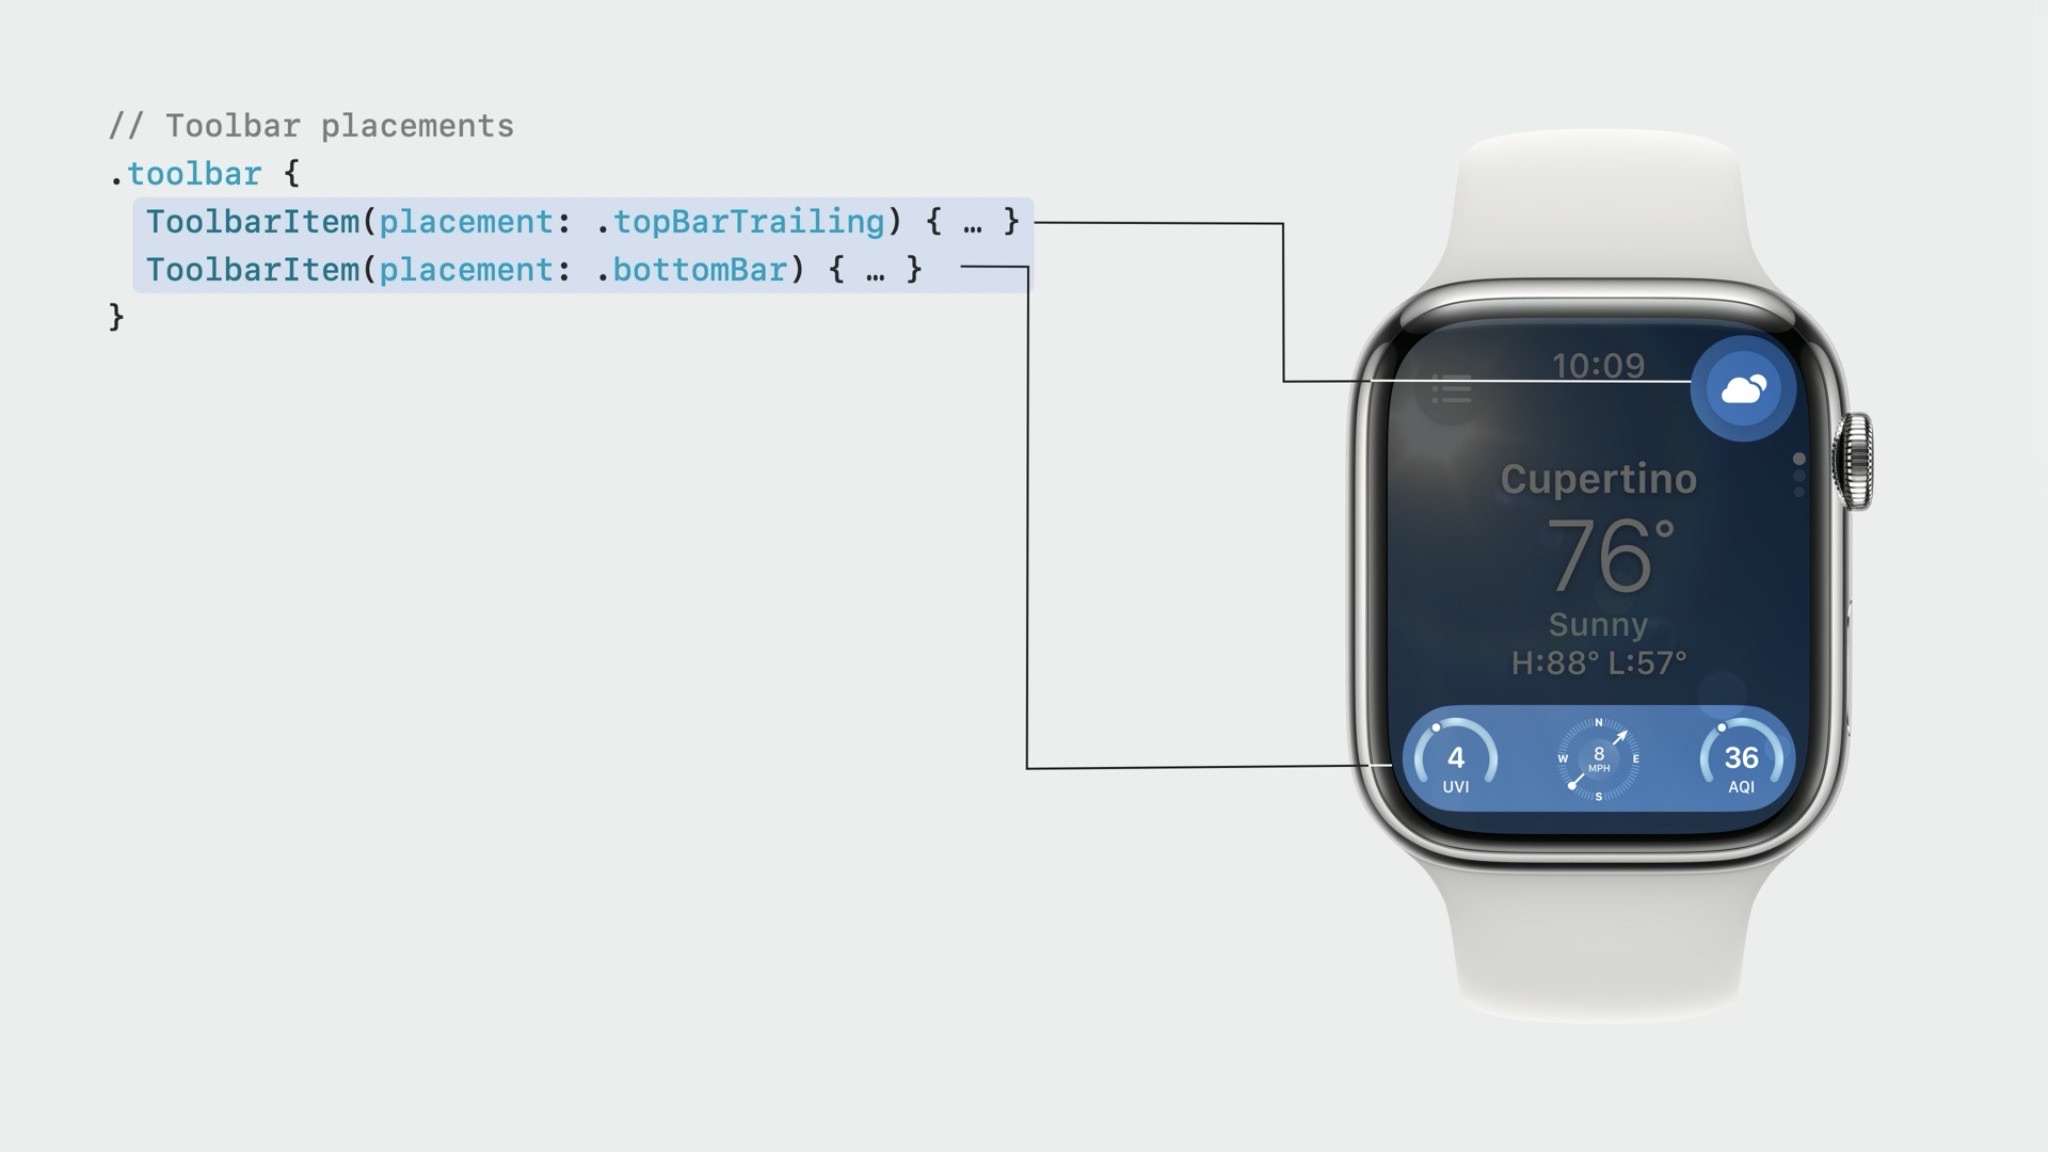
.containerBackground(for: .navigation) { ... }:设置容器背景,在不同容器中切换时能够顺滑切换ToolbarItem 新增 topBarLeading 和 topBarTrailing(均包含跨平台支持)支持 DatePicker 和 List selection
所有平台的 Widgets 均由 SwiftUI 构建。
🎉 Widget 支持「交互和动画」
Widget 按钮点击后触发的是 Bundle 里的 App Intents 相关代码
用 .animation 和 .transition 为元素增加动画
Previews
基于 SwiftUI 5.9,你可以用宏来构建 Preview
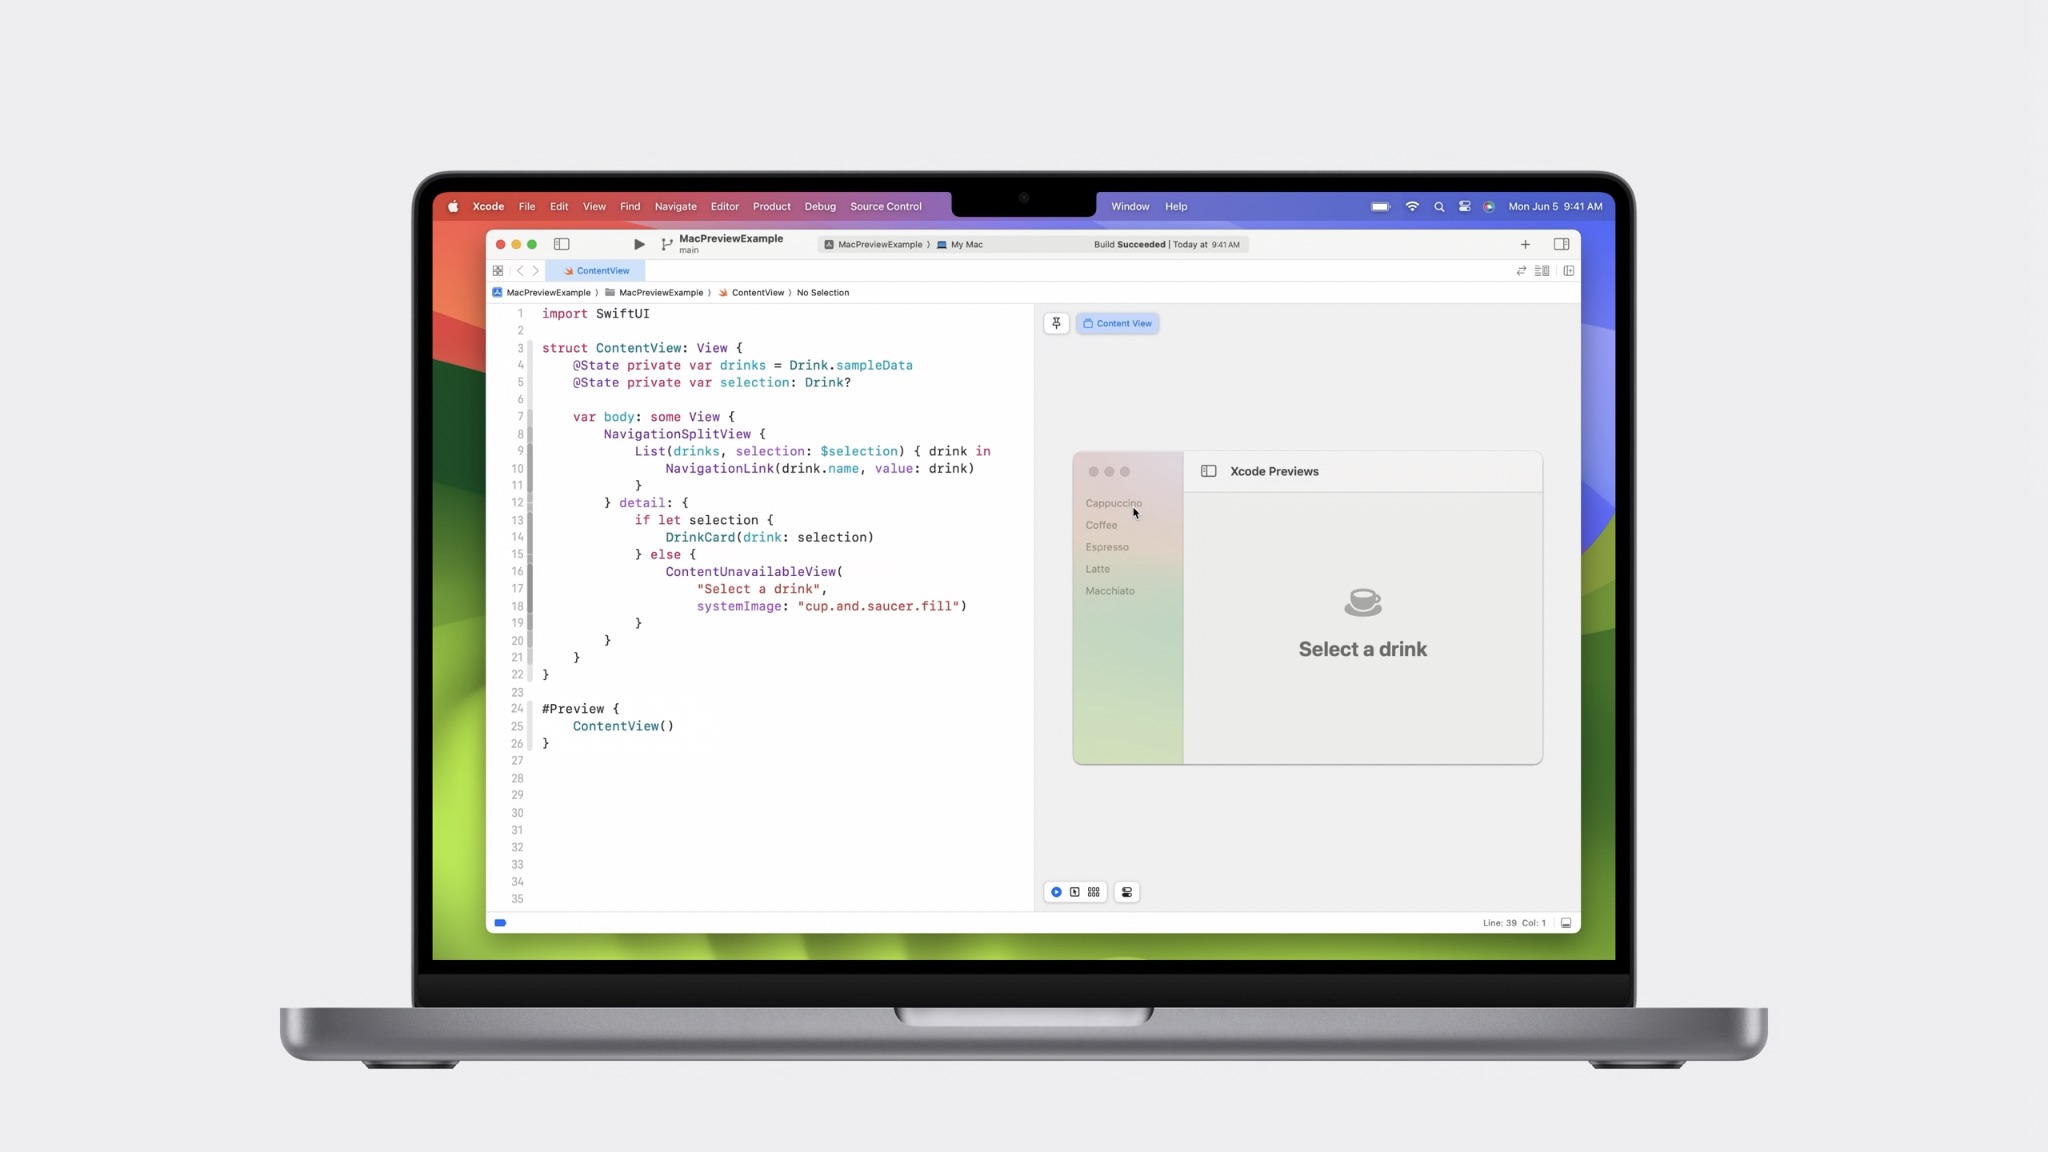
macOS app 支持 Live Preview
1 2 3 #Preview ("Preview Name" ) { ... }
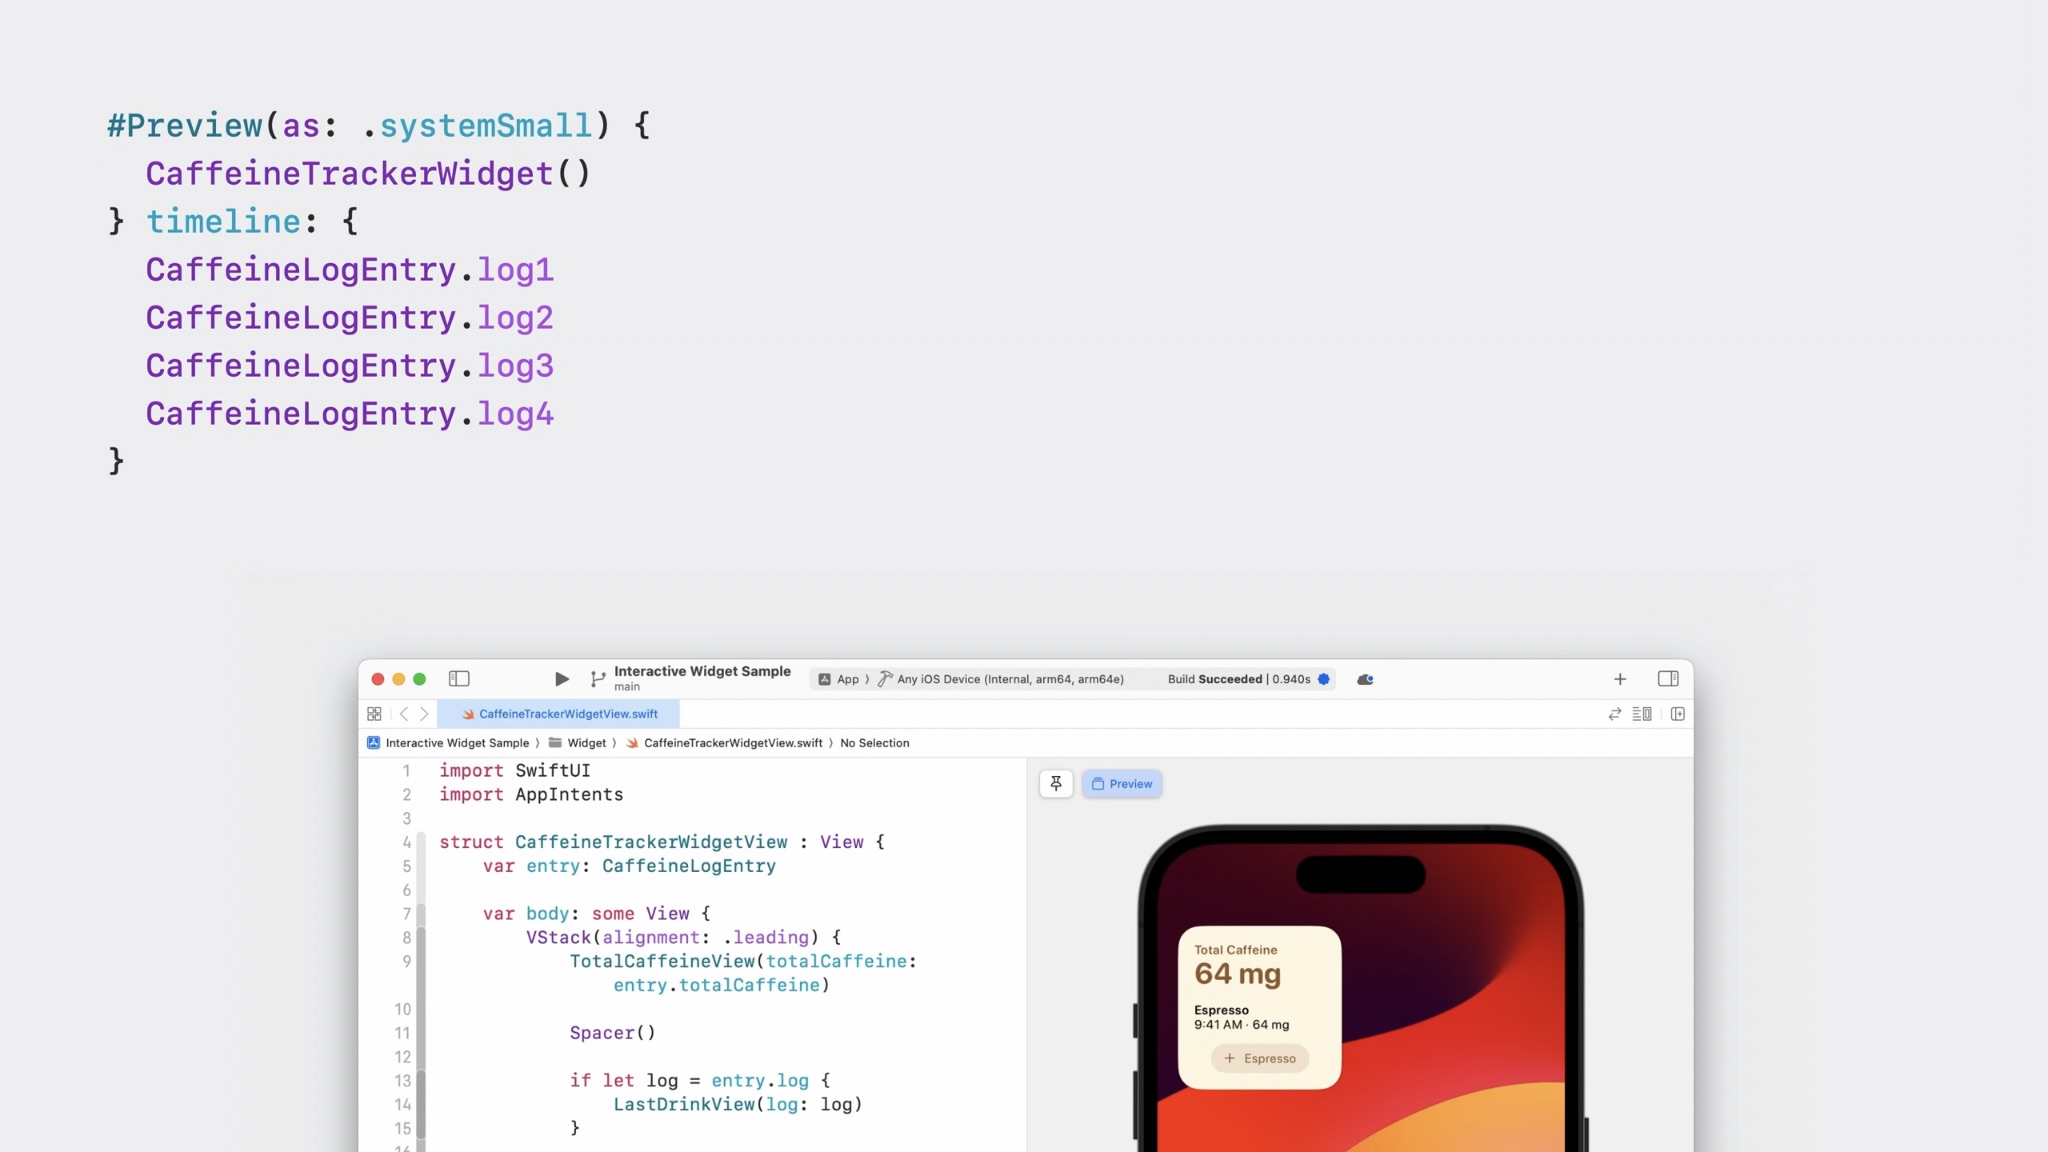
预览 Widget 动画:
1 2 3 4 5 6 7 8 #Preview (as: .systemSmall) { CaffeineTrackerWidget () } timeline: { CaffeineLogEntry .log1 CaffeineLogEntry .log2 CaffeineLogEntry .log3 CaffeineLogEntry .log4 }
更多更新:
MapKit for SwiftUI:更全面地控制、自定义
Swift Charts:支持滚动、选择、饼/环状图
StoreKit for SwiftUI:更简单地构建内购页面
…
简化的数据流 @Observable
1
2
3
4
5
6
7
8
@Observable class Dog : Identifiable { var id = UUID () var name = "" var age = 1 var breed = DogBreed .mutt var owner: Person ? = nil }
1
2
3
4
struct DogCard : View { var dog: Dog ... }
SwiftUI 中的数据流被简化成 @State 和 @Environment
@State 处理可更改的变量@Environment 融合了原先的 @EnvironmentObject
1
2
3
4
5
6
7
8
9
10
11
12
13
14
15
16
17
18
19
20
21
22
23
24
25
26
27
28
29
30
31
import SwiftUI@main struct WhatsNew2023 : App { @State private var currentUser: User ? var body: some Scene { WindowGroup { ProfileView () .environment(currentUser) } } struct ProfileView : View { @Environment (User .self ) private var currentUser: User ? var body: some View { if let currentUser { UserDetails (user: currentUser) } else { Button ("Log In" ) { } } } } @Observable class User : Identifiable { var id = UUID () var name = "" } }
SwiftData 隆重介绍,SwiftData。
SwiftData 提供了 Swift 式的 Core Data 实现,支持 Swift 5.9 的宏。
只需要把 @Observable 改为 @Model 就可以了,不用担心,@Observable 的能力也会完全保留。
在 SwiftUI 中,使用 @Query 来查询数据。
1
2
3
4
5
6
7
8
9
10
11
12
13
14
15
16
17
18
19
20
21
22
23
24
25
26
27
28
29
30
31
32
33
34
35
36
37
38
39
40
41
42
43
44
45
46
47
48
49
50
51
52
53
54
55
56
57
58
59
import Foundationimport SwiftUIimport SwiftDatastruct RecentDogsView : View { @Query (sort: \.dateSpotted) private var dogs: [Dog ] var body: some View { ScrollView (.vertical) { LazyVStack { ForEach (dogs) { dog in DogCard (dog: dog) } } } } struct DogCard : View { var dog: Dog var body: some View { DogImage (dog: dog) .overlay(alignment: .bottom) { HStack { Text (dog.name) Spacer () Image (systemName: "heart" ) .symbolVariant(dog.isFavorite ? .fill : .none) } .font(.headline) .padding(.horizontal, 22 ) .padding(.vertical, 12 ) .background(.thinMaterial) } .clipShape(.rect(cornerRadius: 16 )) } } struct DogImage : View { var dog: Dog var body: some View { Rectangle () .fill(Color .green) .frame(width: 400 , height: 400 ) } } @Model class Dog : Identifiable { var name = "" var isFavorite = false var dateSpotted = Date .now } } #Preview { RecentDogsView () }
Document-Based App
增加了一个全新的 API 用以快速构建 model container:
1
2
3
4
5
6
7
8
9
10
11
12
13
14
15
16
17
18
19
20
21
22
23
24
25
26
27
28
29
import SwiftUIimport SwiftDataimport UniformTypeIdentifiers@main private struct WhatsNew2023 : App { var body: some Scene { DocumentGroup (editing: DogTag .self , contentType: .dogTag) { ContentView () } } struct ContentView : View { var body: some View { Color .clear } } @Model class DogTag { var text = "" } } extension UTType { static var dogTag: UTType { UTType (exportedAs: "com.apple.SwiftUI.dogTag" ) } }
文档编辑器现自动支持分享和重命名
文档编辑器的 toolbar 中默认加入 Undo & Redo
新的 Inspector View:用于修改选中内容的属性,并能自适应不同尺寸的设备
.fileMover,.fileImporter,.fileExporter 支持自定义 Label.confirmationDialog 支持「不再询问」、「严重等级」HelpLink:「帮助」按钮
Table
持久化自定义列
大纲视图
程序化控制 Section 展开与否
backgroundProminence 使得 UI 更加灵活、易读更多表格自定义选项,例如:可隐藏表头,可关闭隔行背景等
对于大数据集,SwiftUI 的性能有很大提升。
具体的这里没说,到时候关注下 Demystify SwiftUI performance
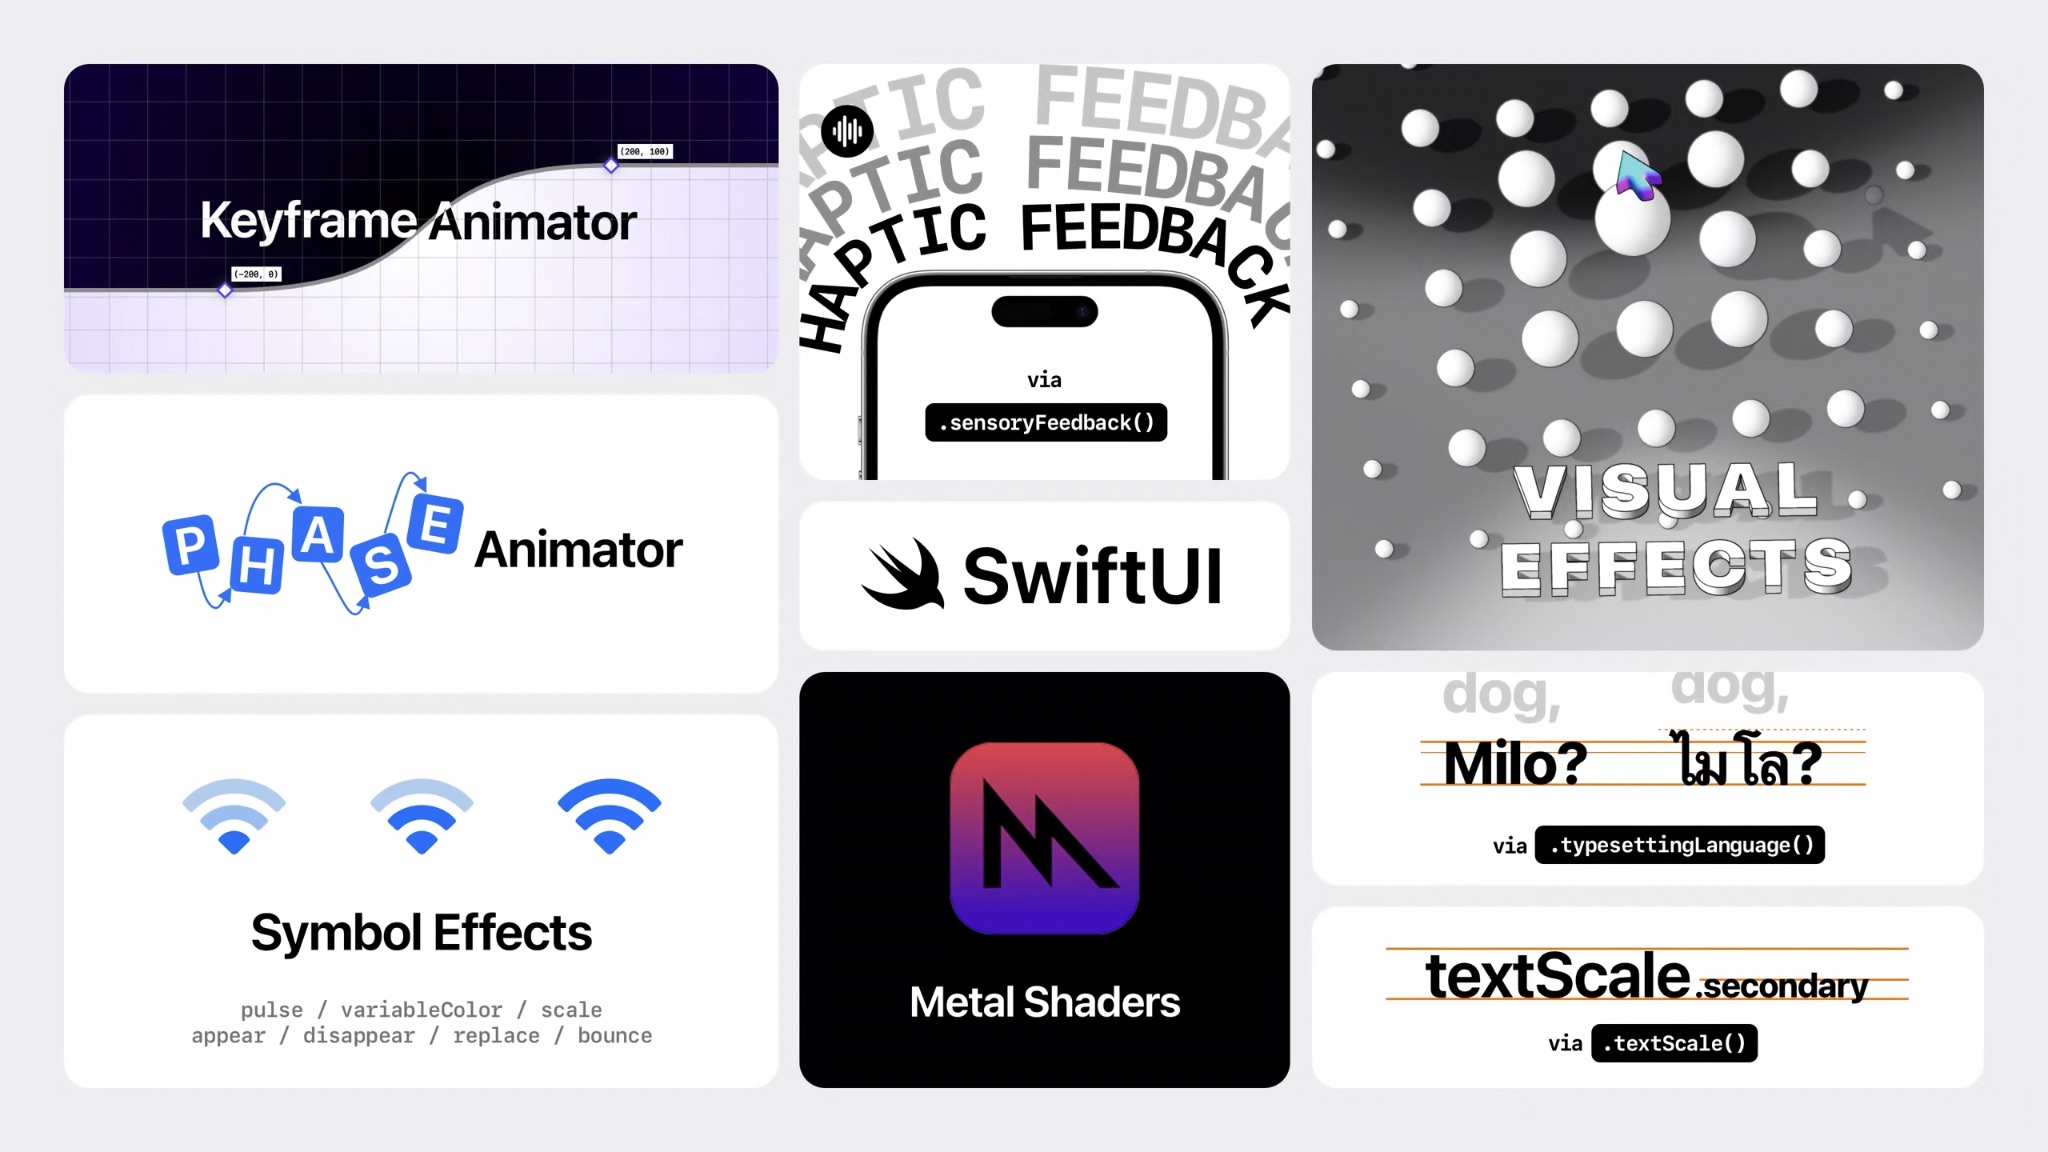
精美的动画
关键帧动画 可以分别对多个属性添加多个关键帧,并指定每一段的动画曲线
1
2
3
4
5
6
7
8
9
10
11
12
13
14
15
16
17
18
19
20
21
22
23
24
25
26
27
28
29
30
31
32
33
34
35
36
37
38
39
40
41
42
43
44
45
46
47
48
49
50
51
52
53
54
55
56
57
58
59
60
61
62
63
64
65
66
67
68
69
70
71
72
73
74
75
import SwiftUIstruct KeyframeAnimator_Snippet : View { var body: some View { Logo (color: .blue) Text ("Tap the shape" ) } } struct Logo : View { var color: Color @State private var runPlan = 0 var body: some View { VStack (spacing: 100 ) { KeyframeAnimator ( initialValue: AnimationValues (), trigger: runPlan ) { values in LogoField (color: color) .scaleEffect(values.scale) .rotationEffect(values.rotation, anchor: .bottom) .offset(y: values.verticalTranslation) .frame(width: 240 , height: 240 ) } keyframes: { _ in KeyframeTrack (\.verticalTranslation) { SpringKeyframe (30 , duration: 0.25 , spring: .smooth) CubicKeyframe (- 120 , duration: 0.3 ) CubicKeyframe (- 120 , duration: 0.5 ) CubicKeyframe (10 , duration: 0.3 ) SpringKeyframe (0 , spring: .bouncy) } KeyframeTrack (\.scale) { SpringKeyframe (0.98 , duration: 0.25 , spring: .smooth) SpringKeyframe (1.2 , duration: 0.5 , spring: .smooth) SpringKeyframe (1.0 , spring: .bouncy) } KeyframeTrack (\.rotation) { LinearKeyframe (Angle (degrees:0 ), duration: 0.45 ) CubicKeyframe (Angle (degrees: 0 ), duration: 0.1 ) CubicKeyframe (Angle (degrees: - 15 ), duration: 0.1 ) CubicKeyframe (Angle (degrees: 15 ), duration: 0.1 ) CubicKeyframe (Angle (degrees: - 15 ), duration: 0.1 ) SpringKeyframe (Angle (degrees: 0 ), spring: .bouncy) } } .onTapGesture { runPlan += 1 } } } struct AnimationValues { var scale = 1.0 var verticalTranslation = 0.0 var rotation = Angle (degrees: 0.0 ) } struct LogoField : View { var color: Color var body: some View { ZStack (alignment: .bottom) { RoundedRectangle (cornerRadius: 48 ) .fill(.shadow(.drop(radius: 5 ))) .fill(color.gradient) } } } } #Preview { KeyframeAnimator_Snippet () }
多阶段动画 对于可拆分为多个阶段的动画,相较于关键帧动画,多阶段动画显得更加简单,在这里可以设置每个阶段对应的动画方案。
1
2
3
4
5
6
7
8
9
10
11
12
13
14
15
16
17
18
19
20
21
22
23
24
25
26
27
28
29
30
31
32
33
34
35
36
37
38
39
40
41
42
43
44
45
46
47
48
49
50
51
52
53
54
55
56
57
58
59
60
61
62
63
64
65
66
67
68
69
70
71
72
73
74
75
import SwiftUIstruct PhaseAnimator_Snippet : View { @State private var sightingCount = 0 var body: some View { VStack { Spacer () HappyDog () .phaseAnimator( SightingPhases .allCases, trigger: sightingCount ) { content, phase in content .rotationEffect(phase.rotation) .scaleEffect(phase.scale) } animation: { phase in switch phase { case .shrink: .snappy(duration: 0.1 ) case .spin: .bouncy case .grow: .spring( duration: 0.2 , bounce: 0.1 , blendDuration: 0.1 ) case .reset: .linear(duration: 0.0 ) } } .sensoryFeedback(.increase, trigger: sightingCount) Spacer () Button ("There’s One!" , action: recordSighting) .zIndex(- 1.0 ) } } func recordSighting () { sightingCount += 1 } enum SightingPhases : CaseIterable { case reset case shrink case spin case grow var rotation: Angle { switch self { case .spin, .grow: Angle (degrees: 360 ) default : Angle (degrees: 0 ) } } var scale: Double { switch self { case .reset: 1.0 case .shrink: 0.75 case .spin: 0.85 case .grow: 1.0 } } } } struct HappyDog : View { var body: some View { ZStack (alignment: .center) { Rectangle () .fill(.blue.gradient) Text ("🐶" ) .font(.system(size: 58 )) } .clipShape(.rect(cornerRadius: 12 )) .frame(width: 96 , height: 96 ) } } #Preview { PhaseAnimator_Snippet () }
触觉反馈 .sensoryFeedback(.increase, trigger: sightingCount)
根据不同平台会有不同的效果,你看需要参考 HIG
该 modifier 是由数据驱动的,当数据变化时才会触发,我之前也做过类似的库:SwiftUI-Haptics
视觉效果 基于位置的动画效果,之前需要用到 GeometryReader,但由于其会占据尽可能大的空间,可能会导致很多问题。
之前的解决方案可能是把 GeometryReader 放在 .overlay 中保持和元素大小位置一致。
在 SwiftUI 5 中,可以直接使用 .visualEffect 即可。
1
2
3
4
5
6
7
8
9
10
11
12
13
14
15
16
17
18
import SwiftUIstruct DogCircle : View { var dog: Dog var focalPoint: CGPoint var body: some View { ZStack { DogImage (dog: dog) .visualEffect { content, geometry in content .scaleEffect(contentScale(in: geometry)) .saturation(contentSaturation(in: geometry)) .opacity(contentOpacity(in: geometry)) } } } }
话说,这个思路貌似就是之前的 .overlay + GeometryReader,这个 API 应该是可以做向后兼容的,我简单写了一个作为参考。
1
2
3
4
5
6
7
8
9
10
11
12
public extension View { @available (macOS 11.0 , iOS 14.0 , watchOS 7.0 , tvOS 14.0 , * ) @backDeployed (before: macOS 14.0 , iOS 17.0 , watchOS 10.0 , tvOS 17.0 ) @ViewBuilder func visualEffect <VisualEffect >(@ViewBuilder _ effect : @escaping (Self , GeometryProxy ) -> VisualEffect ) -> some View where VisualEffect : View { self .hidden().overlay { GeometryReader { currentProxy in effect(self , currentProxy) } } } }
文本格式化增强 在之前的版本中,可以在 Text 中嵌套 Text 或 Image,类似 Text("\(Text("Hello")) SwiftUI")
在 SwiftUI 5.0 中,可以使用 Shader 来格式化文本,其中,Shader 使用 Metal API 构建
1
2
3
4
5
6
7
8
9
10
11
12
13
14
15
16
17
18
19
20
21
22
23
24
import SwiftUIstruct ShaderUse_Snippet : View { var body: some View { Text ( """ \( Text("Furdinand" ) .foregroundStyle(stripes) .fontWidth(.expanded) ) \ """ ) } var stripes: Shader { ShaderLibrary .angledFill( .float(stripeSpacing), .float(stripeAngle), .color(.blue) ) } }
其他
滑块组件增加左右图标到底回弹效果(由新版本 SF Symbols 支持)
SF Symbol 新增动画效果,例如:回弹、缩放,脉冲等
.textScale 简化了 Small Caps 的实现方式,对于没有 Small Caps 排版的语言来说,也能正常显示为小文本对于高文本(例如泰语中的一些字符),使用 .typesettingLanguage 来自动优化行间距
Curt: I’ve only scratched the surface here. There’s even more to discover, from animation completion handlers to building entirely custom animations. I hope you enjoy these APIs as much as I do.
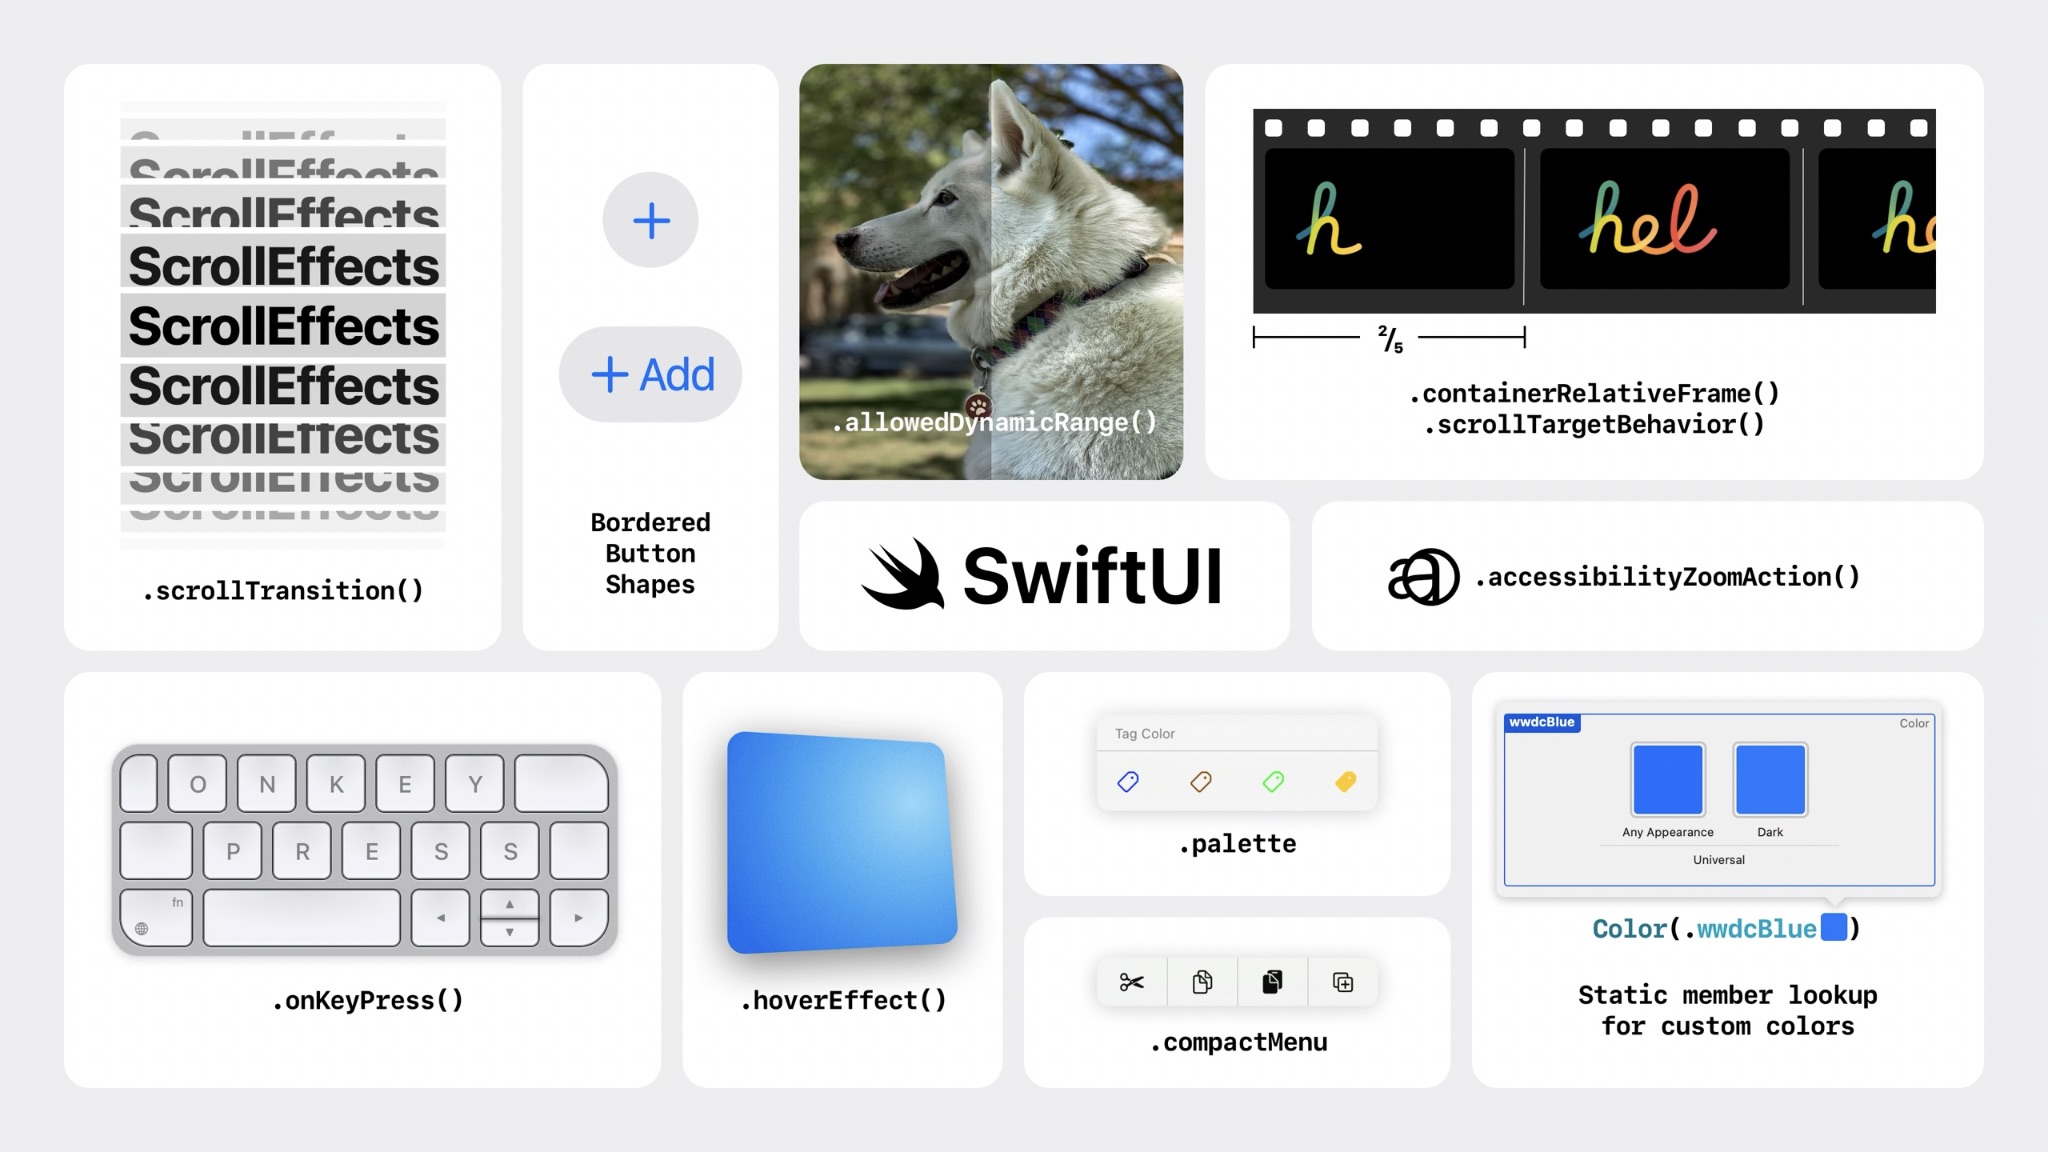
交互增强
.scrollTransition:构建滚动时的元素动画.containerRelativeFrame:基于容器尺寸给出元素的相对大小1 2 YourView () .containerRelativeFrame(.horizontal, count: 5 , span: 2 , spacing: 8 )
.scrollTargetLayout() 将容器中的元素作为一个个目标,允许一个个滚动。.scrollTargetBehavior 提供了对高级滚动行为的控制,包括 .paging 和 .viewAligned.scrollPosition 可以实时获取到可见区域内最上面 的的元素的 ID
Image
.allowsDynamicRange(.high):HDR 渲染图片更好的辅助功能支持,例如:缩放等
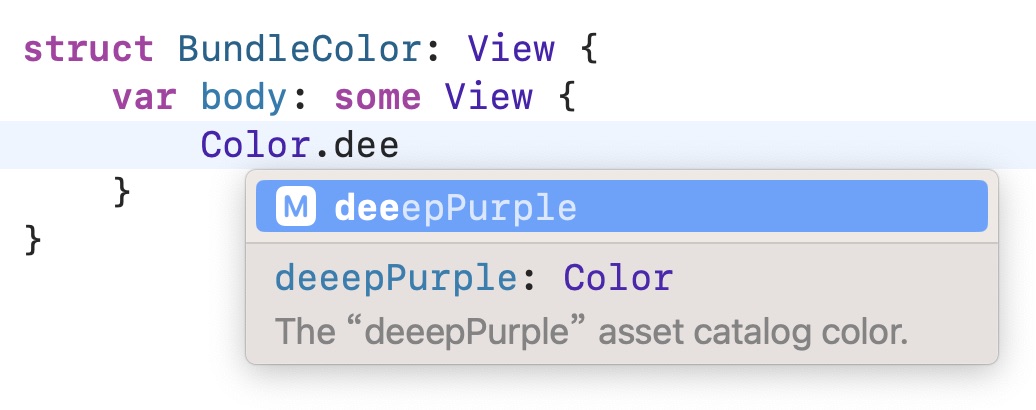
Color
以枚举的形式使用自定义颜色,不用再担心 typo-errors 了
样式
ControlGroup 新增 CompactMenu 样式Picker 新增 Palette 样式.paletteSelectionEffect 简化了 Picker 中的 “选中/未选中” 状态显示新增 ButtonBorderShape.circle
新增 .springLoadingBehavior,允许在 Drag & Drop 时触发操作
tvOS 支持 BorderlessButtonStyle
新增 .onKeyPress 用以响应键盘输入 / 快捷键
写在后面 今年 SwiftUI 的改进还是很大的,总结一下:
新的适用平台
与现有框架的更好融合
新的数据流结构,@Observable,@Model,SwiftData
可控、个性化动画
大量全新 modifiers
ScrollView 增强
…
这篇还属于是一些皮毛,后面还有很多更加深入的 Session 来讨论各个板块的内容。
我们下期再会。🤭